Once a month,
Handmade by Heidi hosts a virtual sewing night on a Friday. We sign up/register, grab our projects, our snacks/drinks so that we can get down to business. We work on existing projects or new projects, basicly anything we want to. The last time I participated was back in the Spring! I've just been so busy with other things that I put participation on the back burner. Click the image below to read all about FNSI!
So for this post I have a few things to share.
~ * ~ * ~ * ~ * ~ * ~ * ~ * ~ * ~ * ~
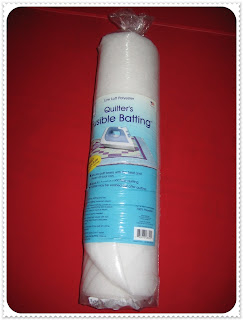
First up, I wanted to try the Polyester Iron On Fusible Batting that I've read about online. I bought it with a coupon so that I could give it a go without having to pay full price. I bought the twin size so that I could use it for other projects. It came with a FREE 4 inch square ruler, which I honestly don't know what I will use for. I never buy anything from Hancocks, Joanns, Michaels, etc without it being on sale atleast 40% off or by using a 40%/50% off coupon!
I have to say that I give it 3.5 out of 5 stars. You make your sandwich and iron with a Wool & Steam setting. It says that it's repositionable, NOPE! It stuck really well with the quilt top but not very well with the backing though I pressed for a few seconds and STEAMED. I'm not sure if I will use it again or not as I'm used to using Warm & White or Warm & Natural.
~ * ~ * ~ * ~ * ~ * ~ * ~ * ~ * ~ * ~
Second, I'm used to sewing with Squares, Triangle & Rectangles. I thought since I had just enough Christmas fabric scraps left over to make a toddler quilt, I would try a different shape, the popular Tumbler. Though I don't have a tumbler template/ruler, I wanted to make my own. So I did a google search and found this blog post by Sparrow in Flight:
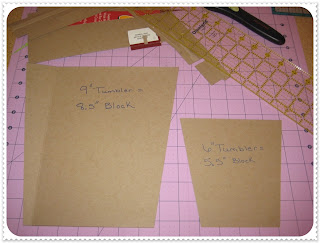
The tutorial is very informative. In her post she made a 5" tumbler to use with her charm packs. I sew with mostly Fat Quarters so I wanted 2 different sized Tumblers (6" & 9"). This is so that I can get either (6) of the 6" or (4) of the 9" per Fat Quarter.
I went to my recycle bins and found a cereal box. So I followed the tutorial and made my 6" & 9". For the 9" I made one slight adjustment. I went 1.5" in from the corner instead of 1". I used my old rotary cutter to get exact and straight lines instead of drawing lines & cutting by hand.
I used the 6"' tumbler for the toddler quilt. I ended up with 80 blocks for an 8x10 pattern which should end up being roughly about 44x55.
~ * ~ * ~ * ~ * ~ * ~ * ~ * ~ * ~ * ~
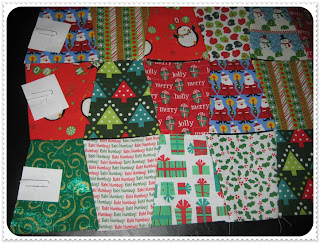
Third, when I first started quilting I would sometimes get my blocks in the wrong order after picking them up off the floor when I do my pattern placement. I would also sometimes sew the blocks in the wrong direction &/or get my pieced strips in the wrong order. Sometimes this was because my cats would jump up on the table and start playing with each other, which would knock everything down on the floor. So now I take a picture for reference and use paperclips with small pieces of numbered papers. This is an extra couple of steps but it really has helped me alot.
When I pick up my squares from the floor, I put the far right block on the bottom of the pile working backwards ending with the far left on the top. Then I paperclip the pile with a number. The paperclipped side lets me know that it's the top side. Then I proceed all the way through the rows. After I sew the rows, I paperclip them again on the left so they don't get out of order.
I still need to clip the threads
~ * ~ * ~ * ~ * ~ * ~ * ~ * ~ * ~ * ~
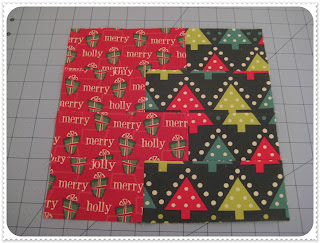
Fourth, I finished a small 20" square quilt wall hanging. I used staggering rectangles and appliqued (2) 3" circles onto the top using a zigzag stitch in a contrasting thread. I didn't "Quilt" it, but used one of my machine's fancy satin stitches over the "ditches". I think it turned out really well. On the back, I added 2 triangle pockets in the corners to insert a dowel rod for hanging.
* Thanks for Reading! *


